
(No, I will not apologize for the pun.)
Last featured on the blog 6 months ago, the PicoPOST is now ready for public testing!
The previous post gave some technical explanation as of the revision 5 prototypes. We’ll bring you up to date on the final technical specs, but first let’s explain why PicoPOST exists, for readers new and old.
(If you just want to skip to how to get one, click here)
Why is the PicoPOST?
The PicoPOST is our attempt to re-invent the classic PC “POST card”, those cheap diagnostic cards that flood your eBay search results. Most retro PC enthusiasts end up with one of these at some point, excited at the promise of making troubleshooting problematic hardware easier. Unfortunately, everyone eventually comes across a whole new problem: You may now know what codes your board is putting out, but that doesn’t mean you know what those codes mean.
Those eBay boards often come with a handy little booklet of POST codes to reference, and it’s easy to be naïve and take those as gospel. Even if it doesn’t, there’s plenty of websites that promise to define the codes for you. Unfortunately, there’s more to deciphering those codes than knowing if the BIOS is from AMI or Award. The truth is that POST codes are often specific to a motherboard vendor, if not a specific board. One board’s “memory test fail” code might be another’s “no video output detected”, even if both boards are from the same year and have the same BIOS vendor. If you don’t have a manufacturer-provided list of codes for that exact model of motherboard, you’re basically just guessing.
The goal of the PicoPOST is to take the guesswork out of the equation.
How is the PicoPOST?
Existing POST cards are very simple devices (almost admirably so), using technology basically as old as the PCs they’re used to debug. Most commercially available cards are built around Intel 8052 compatible microcontrollers, and with a bit of ingenuity, can be built with nothing but a handful of logic gates and a small ROM chip:
But we’re deep in the 21st century now, where 100MHz+ microcontrollers flow like water and cost less than a bottle of it. Just because we’re into retro computing doesn’t mean we have to act like it’s 1984. 😏
Like the name implies, the PicoPOST is built around the Raspberry Pi Pico, a small and very affordable ($4) microcontroller board making use of a chip with two modern ARM cores and a couple of PIO (programmable I/O) “engines” that can handle data far faster than an ISA bus can even dish it out. With this multi-decade jump in technology, we can provide features that the old 8052 can only dream of…
What is the PicoPOST?
Now we get to the proper introduction:
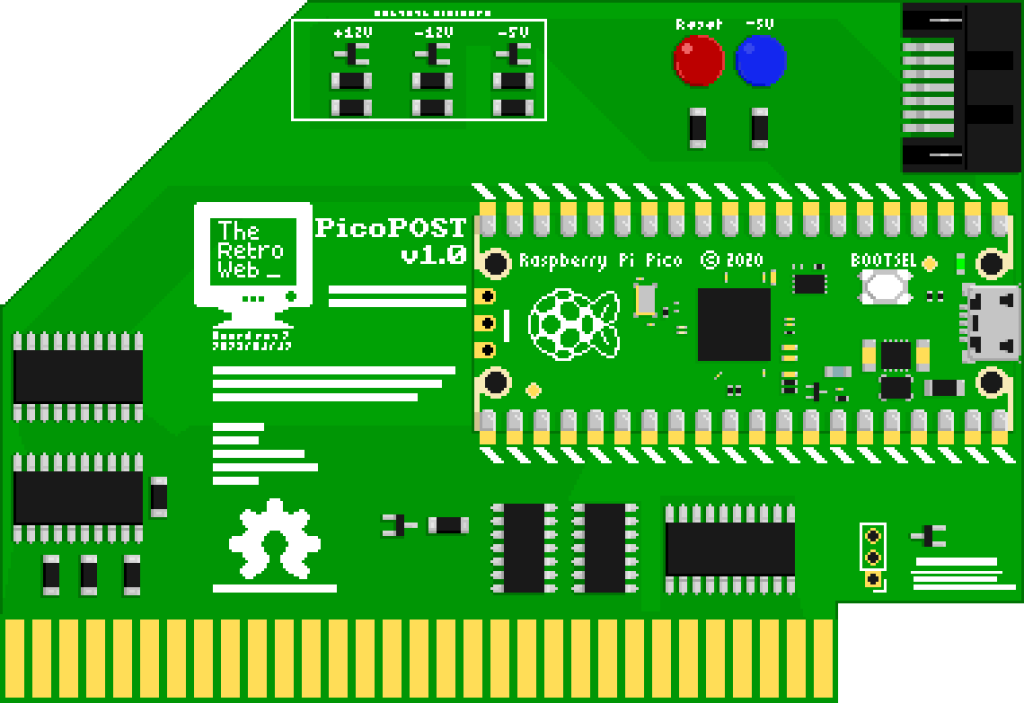
The PicoPOST is an open-source1 hardware project focused on making it easy to diagnose issues on retro PCs equipped with an ISA slot.
1Firmware: MIT, Hardware: CERN OHL v2 Permissive, Documentation: Creative Commons Attribution 4.0 International
In it’s v1.0 release, the hardware is capable of the following diagnostic features:
- Reading all non-DMA ISA activity in the lower 16-bit address range (0000h-FFFFh)
- Voltage monitoring for 12V, 5V, and -12V power rails2
- Bus clock monitoring (CLK, not OSC)
2-5V rail is connected to an indicator LED only
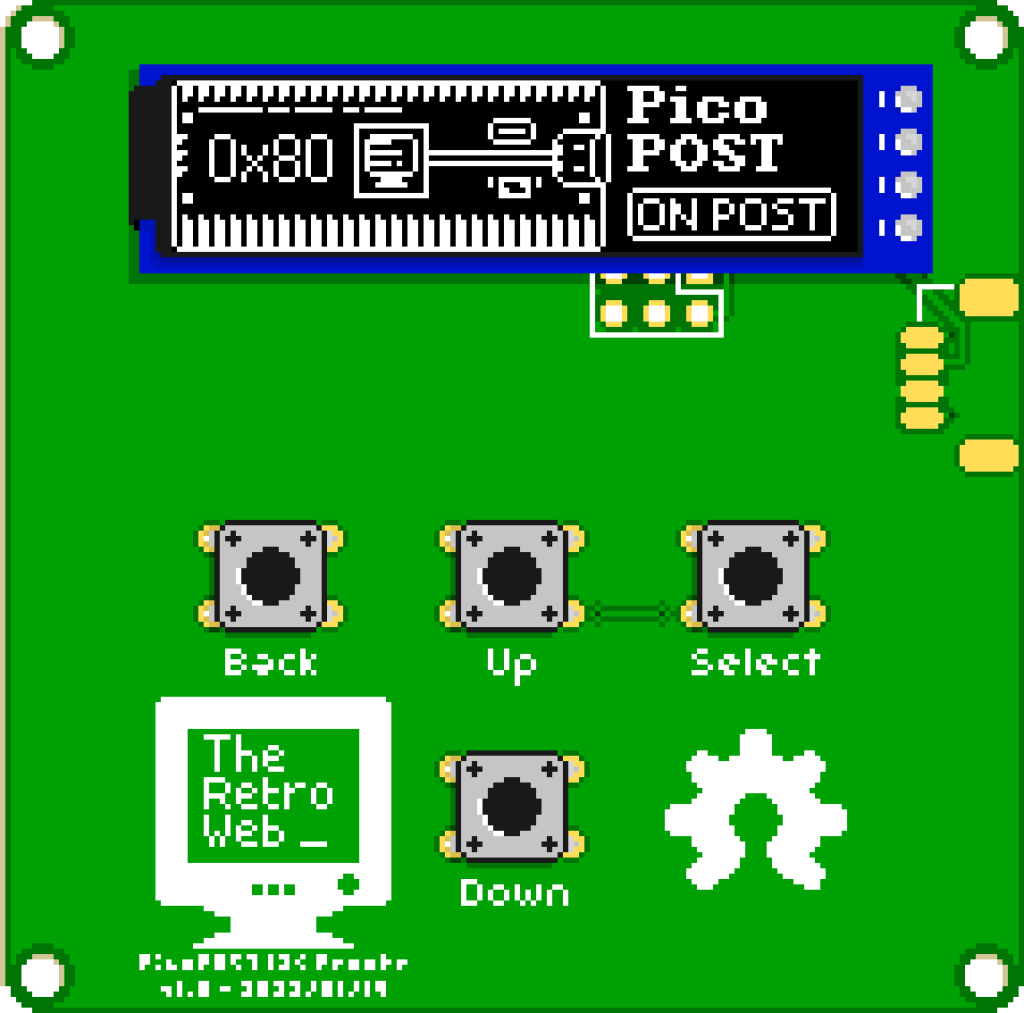
The PicoPOST is controlled by a small remote, which also is the home of the display: a 0.91″ (23mm) 128×32 OLED. This is done for ergonomic reasons, so that no one has to crane their neck to see and control the PicoPOST.
As of writing (2023/05/22), the latest firmware (v0.4.1) provides the following features:
- Intuitive user interface on the remote
- Port 80h/90h/84h/300h/378h POST code readout with 4-deep output history
- That’s the diagnostic ports for standard, PS/2, Compaq, EISA, and Olivetti PCs respectively
- Voltage readouts for 12V and 5V rails
- OLED dimming and screensaver upon inactivity
And here’s what’s coming for the firmware:
- -12V voltage readout
- Need proper coefficients to provide accurate readout
- Full bus activity trace
- Technically ready to go, but need to confirm nothing gets dropped
- Bus clock readout
- Not yet implemented
Where is the PicoPOST?
At this time, you can build your own yourself!
If that scares you, don’t worry: the PicoPOST was designed from the beginning to be easy to assemble. In fact, it could make an excellent first SMD (surface-mount) soldering project for you!
To this end, an illustrated Build Guide has been designed and written to help you through the process, step-by-step.

PCB fab files:
PicoPOST Main Board
PicoPOST Remote
The above .zip files are “Gerber” files ready to be uploaded to a PCB fab house such as JLCPCB or PCBWay. The default recommendations for board specifications from either should work just fine (though if you’re willing to spend a bit more, ENIG will provide much nicer and prettier pads than the default HASL!).
This pre-defined cart makes it easy to buy all the parts you need in one go. All you will be missing is the SATA cable used to connect the mainboard and the remote.
Once you have PCBs and parts in hand, just follow the Build Guide!
At some point, we may provide ready to go kits for sale. But before we get there…
What, Where, and How the PicoPOST needs your help
So far, the PicoPOST has been primarily designed by just two people, and we’re beyond happy with where we’ve gotten with it. But we’re about to reach a point where we need your help to get it to its full potential.
Like mentioned before, the point of the PicoPOST is to take the guesswork out of troubleshooting retro PCs. However, all we have at this point is a slightly more flexible code reader with some nice quality of life functions. That’s a long way from the goal.
The dream is to have the PicoPOST be able to read and decipher bus communications to determine exactly what’s working on the board, and what’s not. This is going to require a lot of expertise to pull off. That’s expertise not only in programming, but also expertise in PC architecture design, and many other categories.
If you think you’re up to the task of helping us reach this goal, reach out to us on the TRW Discord server, and we’ll be happy to have you on board. You can also take a look at the GitHub repo.
Who to thank for the PicoPOST
The PicoPOST was designed by:
Matthew Petry (fireTwoOneNine) — Hardware Design
Enrico Zaghini (TheRealZago) — Software Design
Special thanks to:
- Rigo (previously known as 0xCats)
- PancakePuppy
- computerguy096
- Deksor (who originally sparked the idea that became the PicoPOST)
- Everyone on the “Retro Pico Hardware” Discord Server
- Everyone else who gave feedback along the way ♥